Showing posts with label DIY Projects. Show all posts

Monday, November 12, 2012

Thanksgiving Binder

This is a little late, but better late than never right?! I was hoping to have this posted by last week but I got caught up with the usual chaos around our household and just couldn't get enough time to sit down and tackle this post. So, lets get started!

If I haven't mentioned already, I'm a HUGE YouTube geek! Secret confession, dont judge me! I love watching other YouTuber's videos over house organization, mommy bloggers, couponers, make-up tips, pretty much anything. You would be amazed what information you can find on YouTube. For me, I feel like I get a better understanding when I can visually see someone explain how to do something. One of my favorite "YouTuber's" is a lady named Jennifer Ross and she has three channels: Organizedlikejen, Myhousewifelife, and Winniethetzutube. She can be a little much at first. If you don't like bubbly, bouncy, happy attitudes then she isn't for you. However, since I'm pretty much that way myself, then I was attracted to her channels and just love her! She is VERY type A and that's exactly what I like about her channel. She gives so many simple yet great ways to get organized while also being extremely possitive and happy about the littlest things in life! (She is also a huge disney freak, which was a bonus for me lol) Early last week she showed how she organized her Thanksgiving Binder. I host Thanksgiving at our house, this being my 3rd year, and as soon as I saw this video, I knew I had to make one right away!! That very day after watching her video, I headed out and bought the supplies needed and put it together. This binder is almost EXACTLY like the one she made, so I can not take credit for the idea or design. I can, however, pass this tip on to you and maybe its something that can help you out as well!

Lets start with the Binder itself. I bought a 1 inch Avery brand binder from Staples. I also purchased some Avery 5 tab pocketed dividers and some page protectors. All the supplies I purchased, including the pocket that I will show you later, cost me just over $15. Not bad!


For starters, I put a simple cover page on the front. I also put on on the side, but didn't get a picture of that. I do hope to have prettier cover page at some point, but that may have to wait until next year. This will work for now :-)


Next, when you open the binder, it starts off with my first tab, Guest list. Now, why have a guest list you ask? Well, I'm sure most of you are like me and there are many family and/or friends that you would like to consider when thinking about who to invite. Here, I like to list EVERYONE that I will and could invite. Then, as they RSVP yes or no, I can then put a check mark or a "Y" or "N" next to their name and then about a week or so before I can put a final head count number at the bottom of the page. That way, I know how many people to consider when figuring up a setting chart as well as making sure I have enough food and beverage for everyone.


The next tab is for my menu. There are TONS of food that we make every year and I have been in the kitchen, food is being served and someone says something like "Where is the Gravy??". Talk about having that "OH CRAP" feeling! I like to have my menu items all listed out so that I can have easy access to them and double check regularly that I have made or am in the process of making everything I intended on making.


The 3rd tab is for my Shopping list and To-Do lists. I'm a HUGE list maker so this gives me a place to keep them organized. I hate writing a list, losing it, and then having to rewrite it only to possibly forget something. I also made a Master Grocery shopping list. I took into consideration the usual items I will more than likely buy every year and typed it up. Just so I don't forget any of the important items.


The next tab is for all of my recipes. This is were I will store the recipes I have chosen to use for the current season. I don't know how many times we have gone to make a recipe for the holiday and cant find it, have to call around to our family and search for the recipe. I finally have a written copy of all the important recipes and now have a place that I know I can find them. I want to store only the recipes I know for a fact I will use for the current holidy in this section. I will store all other recipes in the next tab. I can move them back and forth accordingly.


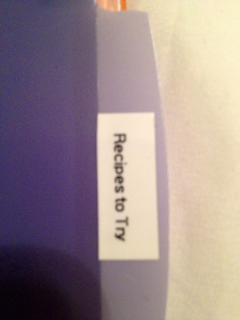
The last tab is for all the recipes I would like to try, either for this holiday possibly or save for next year. I have found tons of recipes on Pinterest, off of food channels on tv, from blogs, or just from other friends or family that sound perfect for the Thanksgiving holiday. But sometimes the stack of these new recipes gets lost and jumbled up and then I end up forgetting about them and never getting a chance to try them out. Now, just like with my very important recipes, they have a place too.


In the back of the binder I put this pocketed file. I can store photos, receipts, or any other misc. items that don't fit into any certain category but that I need to hold on to for any important reason.


 So there you have it folks. My new Thanksgiving Binder. I cannot tell you how good of a feeling it is to be organized during the holidays and know that I have everything in one place. No more hunting down all the recipes, forgetting what I need to buy, not knowing for sure who is coming and if I will have enough food. Everything is covered. And, I have room to improve. I know this binder will just get better every year as I add more to it and as it evolves to fit our needs from year to year. I hope this inspires you to make one for yourself. And if you don't like my tabs, find what works for you and what would help you to stay organized for your own needs. I cant believe Thanksgiving is just over a week away! I hope everyone has the best of Holidays with their loved ones!! Happy Thanksgiving!!
 
P.S. I also plan on making a Christmas Binder! Check back soon!! I plan on tackling that this week :)


Tuesday, January 17, 2012

Magnet Make-up Board, another Pinterest inspiration!

So here we are, yet again. Another Pinterest inspiration. I actually had intention of posting this a LONG time ago right after I had made this. But, as you know, time slipped away from me. It was October so the hustle and bustle of the holidays was right within grasp as well as finals and just the normal craziness that happens from October-Jan for just about everyone! My cousin turned 15 in early October and I struggled with what to get her. I have lately turned to making gifts for people since its a lot cheaper, you can give something one of a kind, and with all the fabulous ideas on Pinterest, it gave a crafty person like me a reason to try something new!

Here was my inspiration:

Pinned Image
Found on Pinterest via LauraThoughts81.blogspot.com

Here is what I came up with:

This was actually so easy to make! I did supply her with magnets so that if she wanted to use it as a make-up board she could, but she could also use it for what ever needs she found suited her best. I just thought it turned out funky and fun and just perfect for her! Here is the process of how I made this magnet board:

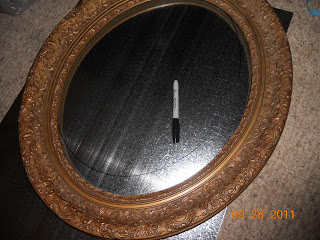
First, I found a cheap frame at the thrift store that had great shape and an awesome design in the molding. Its obviously an ugly frame but it had great potential! I only paid $4 for the frame!! WooHoo!!


Then I had to find something that the magnets could stick to that was light enough to work with. So, the best thing I could find was this Galvanized Flashing. I'm not sure what the actual use for this is, however it was inexpensive and was perfect for what I needed it for. The roll cost about $13 however, there is enough flashing here for me to do about 20 more smaller frames. Needless to say this was a purchase that will come in handy for many other projects down the road. I would say I used about $2 worth of the product, roughly.


Next I just traced out what I needed, then painted the frame a shiney black color.


Now, I didn't want the metal to show so I found some fabric that was on sale at Walmart that I thought would really "pop" in her room. If you have seen my daughters bright neon green walls in her bedroom, then you would be familiar with my cousins walls as its the exact same green color. I felt this pink cheetah fabric, that I only paid $1.20 for, would really work well against the green!


The hardest part of this whole project was finding a way to attach the fabric covered metal piece to the frame so that it would hold. I tried hot glue, super glue, just about 5 different glues I could find around my house. It finally held but lets just say the back is something left to be desired lol. Lucky it wont get seen and all you will see is the fabulous front! It turned out to be a hit and she loved it! I'm thinking of making myself one for the kitchen to keep track of notes, school papers, and reminders. Hope everyone is having a great weekend!


Friday, December 9, 2011

Stove top scents!

I hope everyone is enjoying their Holiday season and have hopefully managed to get most of their shopping done. I still have a ton do buy and do but it will all get done sooner then later I hope :). I'm not sure what the appropriate name for this would be, so I'm just calling it Stove top scents. This scent will fill your entire home with the most beautiful scent just perfect for the Holidays. The best part is its extremely cheap to make and almost all the ingredients were already in my pantry! Who doesn't love stuff when its almost FREE?! Here are the ingredients I used for this stove top scent but you can honestly change it to how ever you want your home to smell.

•Apple Juice (optional, I used about 2 cups worth)
•Water, just enough to fill the pot about 3/4 of the way after adding the apple juice
•Orange Zest (as much as you can get off that sucker!)
•Orange slices (I only used half the orange)
•Apple slices (I only used am half again)
**Fresh Cranberries would be wonderful in this as well!**
•About 1-2 teaspoons of cinnamon, nutmeg, and pumpkin spice.
•1 tablespoon vanilla extract
•1 tablespoon whole cloves

Place all your spices into a big pot on the stove and set the heat to high. Cook on high just until it starts to boil. Once it starts boiling, turn down to a low simmer and cook how ever long you want :) You want to make sure you keep your eye on the pot, if the water starts to get low you need to continue to add water, do not let all the water evaporate out. This pot of scents will last you about a week. YES! A whole WEEK! I haven't had it going a week, only one day but Ive done some research and every thing I have read said you can keep the mixture for a week and it will continue to smell amazing the whole week.


Remember, there are tons of options to this! Any spices you have that you think would create the scents you want your home filled with, add them! You could even probably add any scent oils if you have any of those. The options are endless! And you can use as much or as little as you want. Use less if you want a more subtle smell and use more if you want to make sure everyone smells it right when they first walk into your home. Either way you will be so happy you tried this! Happy Holidays Everyone!

Lauren Holmes

Saturday, October 8, 2011

I think I need rehab...

From Pinterest that is! If you don't know what Pinterest is then DONT ASK! You will be forever changed, in a good/bad kinda way. It has taken over me. I dream about it, I log into the website like a million times a day just to see what all the neat things my friends and other's have posted. And as excited as I am that I found it, I'm also dreading it lol because I have become craft obsessed more then I ever was before. Now I have thoughts 24/7 of how I can turn an ugly lamp shade into something beautiful and pretty to look at. Or how I can repaint an old picture frame into a "make-up magnet board"....which, I actually made just last week.

Since there are just so many cool ideas on the site, I have been inspired to make or craft as many of the gifts on my Christmas list for others as I can. So far, the two projects I have completed have cost me under $20 each!! Yikes!! That's insane!! And as cliche as it sounds, with today's economy that is HUGE for me!

I thought I would share with you one of the gifts I made for my Aunt Laura that I am sooooo in love with! And if my last initial happened to be an "R" I just might have a hard time letting go of this, but its an H so I couldn't get away with that lol. Here's what I made and the steps I took to make a frame go from ugly to wonderful!

{Here is my inspiration for this project. I love the blue with the burlap contrast and just thought this is the perfect easy craft! I wanted to make it a little more my own, so here is what came of the inspiration plus a little of my own tweaking :)  }

I found this on Pinterest but the website its originally from is positivelysplendid.com.


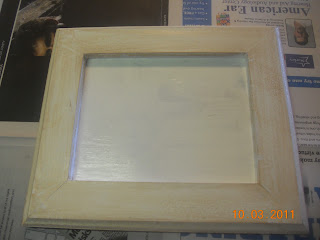
First I found an ugly frame at a thrift store that was normally priced $3 but it was on sale this particular day for half off, so $1.50 :)


Next, I painted the inside of the frame just to cover up the ugly red flowers. I did paint two coats and it didn't completely cover them up, but that's okay because will be covering it up with burlap :)


Then, I printed of a letter "R" in the size that would best fit the inside of the frame (I had to use size 400 which sounds crazy but that's the size I needed). I also cut a piece of burlap to fit the inside of the frame. Then, I just traced the "R" with a sharpie. Much easier then to try and paint it and it still looks great!


Then, I painted the frame a pretty blue and glued the burlap piece inside the frame.


Next, to give the frame a more rustic look I painted some black over the blue. In order to get this look I took a medium sized bulky paint brush, dabbed it in paint, and then on a dry area of paper I dabbed most of the black OFF the brush, that way there would be very little black actually going on the frame and I could control the amount of black I wanted little by little.


For the flower detail I just folded up circles of white felt. I folded small circles into half circles and then in half again and then just stacked them in alternating directions to give this really cute flower. I added a red button for the center of the flower, I loved the contrast of the red against the blue in the inspiration picture so I just thought this was the perfect touch! I also just cut out two pieces of the burlap to make the leaves, no tracing, just did a rough cut.


Once it was all dry I added a burlap bow for a hanger. (I have burlap coming out of the wazoo from our wedding this past summer).

Here is my finished product!!


Isn't it precious!! I will be doing this again very soon, it only took me a couple of hours to make and was soooo easy! I bought two of the ugly frames so I still have another frame waiting for me to beautify! And total cost for this was $1.50! Yes, you read right, one dollar and fifty cents!! I had everything to make this not including the frame so the only cost I was out was the frame itself. Thank god for thrift stores right?!

I cant wait to show you the make-up magnet board I made for my cousin! Stay tuned for the tutorial!! Happy Crafting!